Wednesday, February 20, 2019

Reindeer Tracks

Hello everyone!
 Tonight I am sharing a card I made inspired by a season that is quickly nearing its end. Those cold wintery nights and that sparkling glimmer caused by the natural light of the moon bouncing off the surface of nature's own magical wonders. I made this card specifically for 7 Dots Studio Feburary challenge. 

https://7dotsstudio.com/archives/34521

Product List:
2Crafty Chipboard Circle Frame 
Seth Apter "Rocky Road" textured embossing powder 
Tim Holtz stencil 021
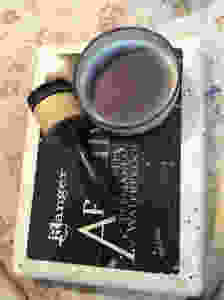
Ranger Ink texture paste and white embossing powder
Black gesso 
Recycled cardboard
Tacky glue
Double-sided tape

1. I began by cutting out my desired papers and distressed them using a pair of scissors. 
2. Then I taped down the beautiful yellow paper with the stunning crowned reindeer. 
3. Then I took my stencil and texture paste and created that lovely snowy looking background. 
4. Next, I took a lovely chipboard frame and embossed it white.

5. Next, I layed down those gorgeous papers, tags and stickers in layers that I felt were pleasing to the eye. 
*Hint* *Keep cardboard scraps to prop up your embellishments, it will save you on buying those glue dots every month*
6. I took some wooden snowflakes I found in my stash that were originally silver. I embossed them with textured black embossing powder to make them POP against the paper.
I finished this card off with a paint brush and some watered down black gesso to give it a grungy appearance. 

I hope you all enjoy my latest creation. Thank you for stopping by and sharing your support and some of your time with me. 

Thursday, February 14, 2019

Valentine's Day Blog Hop & Giveaway

Hello there my fellow crafting beauties! Jess here again to share a tutorial with you. This time it's to win some goodies! All you have to do is stop by each blog and leave some love. It's that easy! Who doesn't like to win some crafty goodies, right?! We all thank you for your time and support in hopping along with us.
Giveaway Rules:
All you have to do is hop along and leave some love on each blog posting to enter yourself in to some spectacular giveaways.


Products used:

Canvas Corp Brands: Tattered Angels Limited Edition - Cross My Heart
Canvas Corp Brands: 7 Gypsies: Architextures - Tall Base Dress Form
Hobby Lobby: "18 Slatted Wooden Heart - Not available online
Hobby Lobby: Ranger - White Embossing Powder
Hobby Lobby: Ranger - Archival Black Ink Pad
Jo-Ann Stores: Ranger - Blending Tool
Hobby Lobby: Ranger - Tim Holtz - Corked Vials
Hobby Lobby: Master's Touch - Black Gesso
Michaels: Recollections - Extra Fine Glitter Set
Wal-Mart: Hampton Art - Black Rhinestones - Not available online
Random flowers and embellishments from my stash

Let's get started shall we?!
We start out with an unfinished slatted wooden heart.
.

We begin by laying down a coat of heavy white gesso to the entire surface. Allow your gesso to dry. Don'y worry it dries quickly.
.

If you don't already keep your chipboard scraps, I highly suggest that you do. You'd be surprised as to the interest it will bring to any of your projects. So, if you have some left over chipboard scraps in your stash, use them now.

We'll adhere our chipboard scraps using tacky glue and paint it too with white gesso. While that dries we'll paint the recycled cardboard paperclip packaging. *Tip* A lid of any kind will work too.

Our next step is to lay down some of that beautiful glimmer mist! If you like the watercolor effect, I suggest spraying on some water and drying with a heat gun immediately. If you more desire a smoother, more blended look simply spray on water and tilt the heart in all directions over your towel (to catch any excess ink) to more evenly blend the color along the surface.

My favorite part! After the ink is dry, it's time to start adding our embellishments! Play with the composition of your elements until you acquire your desired look.

Remember that lid we painted with white gesso? Well, we're not done yet. Get out your blending tools and some ink. As you see in this photograph, I've chosen to distress its edges along with the bed. I distressed the bed in hopes that it would make the glitter vials POP once they were placed. I think it worked out marvelously, don't you?

Here are those corked vials filled with glitter goodness. It's Valentine's Day, I had to go with the traditional colors red, black, and white.

After a little playing with the composition, here is our dress form and our flowers with their bits and bobs in place.


We will finish this piece off by adding a CE embossed word sentiment, some black rhinestones, and splattering it with watered down black gesso.

I hope you enjoyed the tutorial today.
Here are some close-ups!

I can't thank you enough for stopping my my small corner of the world!

Without further ado!

GIVEAWAY RULES: Not every blog is offering a prize but, that doesn't mean you can pass that blog. If you want our prizes you have to visit each blog for a chance to win some fabulous crafting goodies.

Here are all the links:
PolymerCreations4U: A Journey into Craftiness https://polymercreations4u.wordpress.com/
Psychotic Ramblings of a Serial Scrapper - https://ole682000.blogspot.com/2019/02/valentines-day-blog-hop.html
Whimsy Chic Paper Crafts Etc: https://youtu.be/NUer_-9kWpI